How Can We Help?
Video Creator and YouTube Overview
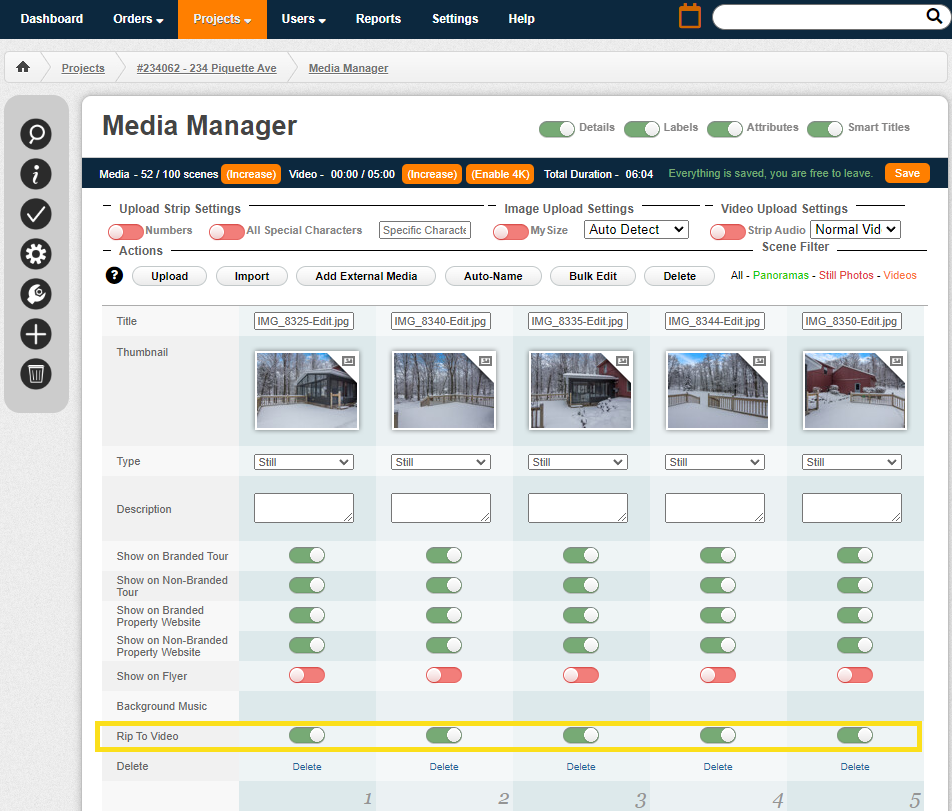
The Video Creator is a free service we offer to Compile an MP4 video of your tour. Any media marked “Rip To Video” in the Media Manager will be included in the video after its Compiled. This includes stills, panos, and video clips. Once the compile is complete, a link will appear to download your video. You can also automatically post the video to YouTube that will be hosted on the RTV YouTube account, or if you link your own YouTube channel, it will be posted there instead. Alternatively, if your client has their own YouTube account, then they can tie their RTV account to theirs as well.
Watch the video below to learn about the functionality of the video creator and how to connect your YouTube channel!
Before starting a compile, be sure to have your Media Manager already loaded with media.
1. Open a Project.
2. Click the “Video Creator” link under Tools in the sidebar.
3. Toggle the Compile Video setting to green.
4. To post the resulting video to YouTube, also toggle the Post to YouTube setting to green. This can also be done after the video has been Compiled.
Video options should be set before attempting to Compile.
5. Click Save
You can find the Video Creator under Project Tools within a project.
There are three toggles. The first is Compile Video, which begins once the Save button his clicked after being switched on.
Expedited Queue will place your video in front of the processing queue of those that have not also been expedited, for an additional $3.
Lastly is Post to YouTube. This can be done at the same time as the compile is taking place, or can be turned on later and uploaded at a different time. If you have a linked YouTube account, or your agent has their YouTube account attached, it will post to that account. Otherwise, it will be posted to the RTV account at the minimum.
Once the compile has completed, you will see the Video Status as Ready and a link for download, as seen below.
How to connect your YouTube Channel
First thing you are going to need to do is naviagate to Settings, then scroll down and under Integrations on the left, click YouTube. From here you will see your linked channel and status. Sometimes a channel needs to be relinked due to expired privileges, so be sure to check this area occasionally.
Now you have the option to toggle Enable Posting on and/or allowing videos to be posted to your agents / brokers channels if they have those linked. Once you have those toggled to green, hit Save.
Upon hitting Save you will be redirected to choose the account that you wish to link. Be sure its the one that has the YouTube channel you wish to upload to.
On this page, while the screenshot doesn’t show it, there will most likely be boxes to check for special privileges allowing RTV access to upload to your channel. Be sure to check those boxes, and hit Continue.
Following that, you will be directed back to RTV where your linked channel will be listed. Your videos will now post to your channel instead of the default channel provided by RTV.
Video Settings
Video Title Enabled – Show the Tour Title in the Intro and Overlay
Video Address Enabled – Show the Property Address in the Intro and Overlay
Still Photo Resizing – How to resize an image if it is not already in a 16×9 format.
Crop will cut off the top/bottom or left/right until the image fills the frame. Will not add black bars
Scale will resize the image to fit everything inside the frame, while keeping the original ratio. Will add black bars
Intro Title Scene Enabled – Show the Intro Title which contains Title, Address, and the Tour Agent’s/Co-Agent’s/Owner’s Photo and Logo if enabled below
Video Overlay Enabled – Show the top video overlay
Closing Title Scene Enabled – Show the Closing Title Scene which contains all the enabled information below
User Information Settings
FSD Information Enabled – Enable settings in the FSD Information section
Agent / Owner Information Enabled – Enable settings in the Tour Agent/Owner Information section
Co-Agent Information Enabled – Enable settings in the Co-Agent Information section
FSD, Tour Agent / Owner, and Co-Agent Information
Logo / Company Logo – The logo in the agent’s Branding page or the FSD Company page
Phone – The number in the agent’s Basic Information page or the FSD Profile page
Website / Company Website – The website in the agent’s Basic Information page or the FSD Company page
Profile Photo – The photo in the agent’s Branding page or the FSD Profile page
Fax – The number in the agent’s Basic Information page or the FSD Profile page
Email – The email in the agent’s Basic Information page or the FSD Profile page